Contents:
- What Is Black Spot Disease on Roses?
- Why Roses Get Black Spots: The Science Behind the Spread
- Regional Differences Across the US
- Identifying Black Spot vs. Other Leaf Problems
- How to Treat Black Spots on Rose Leaves
- Remove and Dispose of Infected Material
- Fungicide Options: Conventional and Organic
- Eco-Friendly and Sustainable Prevention Strategies
- Practical Tips for Roses Black Spots Leaves: A Quick-Reference Guide
- FAQ: Black Spots on Rose Leaves
- What causes black spots on rose leaves?
- Can black spot kill a rose bush?
- How do I get rid of black spots on rose leaves naturally?
- Should I cut off leaves with black spots?
- What rose varieties are resistant to black spot?
- Keep Your Roses Healthy Season After Season
In 1867, when horticulturists first formally classified the hybrid tea rose, they celebrated its beauty — and almost immediately began documenting its vulnerabilities. Chief among them was a stubborn fungal disease that left dark, circular blemishes across the foliage, eventually stripping the canes bare. Over 150 years later, gardeners across the United States are still asking the same question: why do my roses have black spots on the leaves? The answer hasn’t changed much, but our ability to manage it certainly has.
What Is Black Spot Disease on Roses?
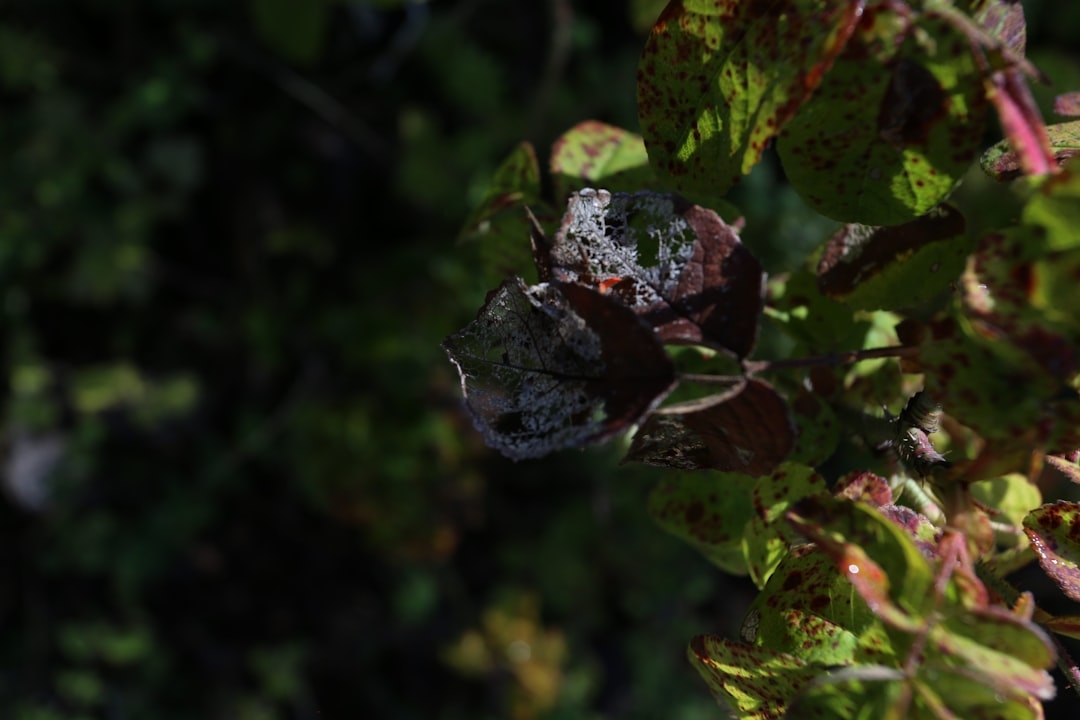
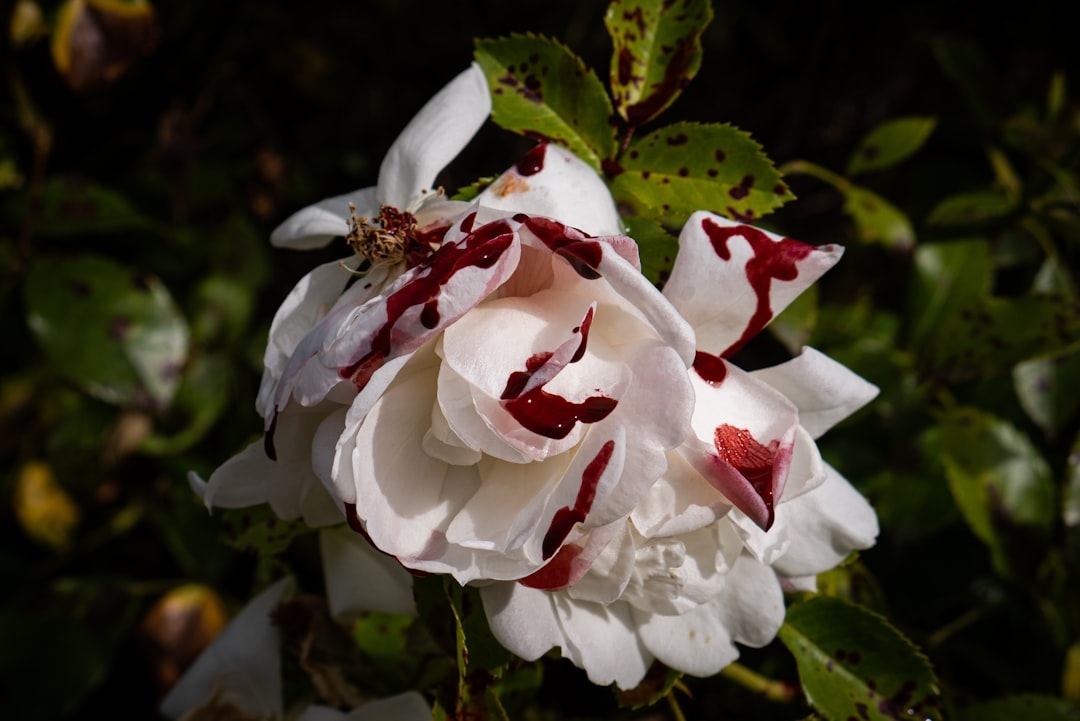
The culprit is Diplocarpon rosae, a fungal pathogen that targets roses almost exclusively. It produces circular, fringed black spots — typically between ¼ and ½ inch in diameter — on the upper surface of leaves. Within days, the surrounding tissue turns yellow, and leaves begin to drop prematurely. A severely infected plant can lose all its foliage by midsummer, weakening the canes and reducing flowering for the rest of the season.
The fungus spreads through spores that travel in water — rain, overhead irrigation, even dew. Once a spore lands on a wet leaf and temperatures sit between 65°F and 75°F, infection can establish within just 7 hours of continuous moisture. That’s why warm, humid mornings are the disease’s favorite conditions.
Why Roses Get Black Spots: The Science Behind the Spread
Understanding Diplocarpon rosae means understanding its life cycle. The fungus overwinters in infected canes and fallen leaves, then releases spores in early spring when temperatures begin to climb. A single lesion can produce thousands of secondary spores, each capable of starting a new infection point on the same plant or a neighbor.
Roses planted too close together — less than 3 feet apart — create a microclimate where air circulation stalls and foliage stays wet longer. Poor airflow is one of the single biggest risk factors for black spot. The disease doesn’t discriminate by age; both new growth and established leaves are susceptible, though young, tender leaves tend to show symptoms first.
Regional Differences Across the US
Geography plays a significant role in how aggressively black spot behaves. In the Southeast — Georgia, the Carolinas, Louisiana — high humidity and long warm seasons mean black spot pressure starts earlier (often April) and lasts nearly year-round. Gardeners there often need a preventive spray program from the moment new growth emerges.
In the Northeast, the disease typically peaks in July and August when summer humidity spikes. Early detection matters more than early intervention in this region. Meanwhile, Pacific Northwest gardeners contend with consistent rain and moderate temperatures that keep foliage wet for extended periods — optimal conditions for spore germination even in cooler months. Gardeners in arid Western states like Arizona or Nevada have a natural advantage: low humidity and dry summers slow the disease considerably, though overhead watering can reintroduce risk.
Identifying Black Spot vs. Other Leaf Problems
Not every dark mark on a rose leaf is black spot. Knowing the difference saves time and prevents unnecessary treatment.
- Black spot (Diplocarpon rosae): Circular, dark spots with fringed or feathery edges; yellow halos; primarily on upper leaf surfaces; leads to leaf drop.
- Rose rust: Orange or rust-colored pustules, mainly on leaf undersides; more common in the West and Pacific Coast.
- Cercospora leaf spot: Smaller brown spots with a purple border; less common but occasionally confused with black spot.
- Spray burn or fertilizer damage: Irregular brown or black patches without the distinctive fringed edges; typically no yellowing pattern.
True black spot always features that characteristic fringed margin. If you’re uncertain, a local cooperative extension office can confirm the diagnosis — often for free.
How to Treat Black Spots on Rose Leaves
Treatment works best when started early. By the time 30% of foliage is affected, you’re playing catch-up. The goal shifts from cure to containment.
Remove and Dispose of Infected Material
Start by stripping all visibly spotted leaves from the plant — including any that have already fallen to the ground. Do not compost them. Bag and dispose of them in the trash, since Diplocarpon rosae spores can survive a standard compost pile and reinfect the following season.
Fungicide Options: Conventional and Organic
Fungicides don’t cure existing spots, but they protect healthy tissue from new infections. Apply them to thoroughly coat both sides of the leaves, and reapply every 7 to 14 days or after rain.
- Chlorothalonil or myclobutanil: Conventional contact and systemic options with strong efficacy; available in most garden centers under brand names like Daconil or Immunox.
- Neem oil: A botanical option derived from the neem tree; effective when applied preventively, less so once disease is established. Concentrations of 70% neem oil diluted to label instructions work well.
- Copper-based fungicides: A traditional choice with broad-spectrum action; best used as a dormant spray in late winter before growth begins.
- Baking soda solution: 1 tablespoon baking soda + 1 teaspoon horticultural oil + 1 gallon water; modest preventive effect, needs frequent reapplication.
Professional rosarians often apply a protectant fungicide before symptoms appear — typically when the first leaves reach the size of a quarter in spring. Waiting for visible spots means the fungus has already completed its initial infection cycle. A 14-day spray schedule from early spring through first frost, rotating between two different fungicide classes, significantly reduces resistance buildup and keeps plants cleaner through the season.

Eco-Friendly and Sustainable Prevention Strategies
Long-term prevention is more sustainable — and less expensive — than repeated chemical intervention. A few cultural changes can dramatically reduce black spot pressure without reaching for a spray bottle every other week.
- Water at the base, not overhead. Drip irrigation or soaker hoses keep foliage dry. Overhead watering in the morning means leaves stay wet for hours — exactly what the fungus needs.
- Mulch generously. A 2- to 3-inch layer of organic mulch (wood chips, shredded leaves) around the base prevents rain from splashing soil-borne spores onto lower leaves.
- Choose resistant varieties. Modern disease-resistant roses — particularly many shrub roses and the Earth-Kind® series developed by Texas A&M — show significantly less black spot than older hybrid teas. Varieties like ‘Knock Out,’ ‘Carefree Beauty,’ and ‘Home Run’ are bred specifically for low-spray programs.
- Space plants properly. A minimum of 3 feet between rose bushes allows air to circulate and foliage to dry faster after rain.
- Clean up every fall. Removing and bagging all leaf litter before winter eliminates the overwintering reservoir for spores, cutting next spring’s infection pressure significantly.
Choosing disease-resistant varieties is the single most impactful eco-friendly decision a rose gardener can make. It reduces fungicide use, conserves water (healthier plants need less), and supports a lower-input garden overall.
Practical Tips for Roses Black Spots Leaves: A Quick-Reference Guide
- Inspect plants every 5 to 7 days from late spring through fall — early detection is your best tool.
- Always sanitize pruning shears between plants with a 10% bleach solution or rubbing alcohol to avoid transferring spores.
- Apply a layer of fresh mulch each spring to reduce soil splash.
- Avoid working with roses when the foliage is wet — you can physically move spores from plant to plant.
- If a plant is chronically infected year after year despite treatment, consider replacing it with a resistant variety.
FAQ: Black Spots on Rose Leaves
What causes black spots on rose leaves?
Black spots on rose leaves are caused by the fungus Diplocarpon rosae. It spreads through water-splashed spores and thrives when leaves stay wet for 7 or more hours at temperatures between 65°F and 75°F.
Can black spot kill a rose bush?
Black spot rarely kills a rose outright, but repeated severe infections weaken the plant significantly. A bush that loses all its foliage multiple times per season produces fewer blooms and becomes more vulnerable to winter damage and other stresses.
How do I get rid of black spots on rose leaves naturally?
Remove and discard all infected leaves, improve air circulation by thinning nearby growth, switch to drip irrigation, and apply neem oil or a diluted baking soda spray every 7 to 10 days as a preventive measure.
Should I cut off leaves with black spots?
Yes. Remove affected leaves as soon as you notice them and dispose of them in the trash — not the compost. This slows the spread of spores to healthy foliage on the same plant and nearby plants.
What rose varieties are resistant to black spot?
The ‘Knock Out’ series, ‘Carefree Beauty,’ ‘Home Run,’ and most Earth-Kind® certified roses show strong resistance to black spot. The USDA and many university extension programs publish regionally specific lists of resistant varieties suited to different hardiness zones.
Keep Your Roses Healthy Season After Season
Roses with black spots on the leaves are fighting a disease that’s been with them since long before modern gardens existed — but that doesn’t mean you have to accept it as inevitable. A combination of smart variety selection, consistent cultural practices, and timely intervention gives even high-maintenance roses a genuine chance at a clean, full season of growth and bloom.
If you’re planning a garden for a special event — a wedding, a milestone anniversary, a memorial — and you want roses as a centerpiece, start planning your disease management strategy now, not when spots appear. Speak with your local cooperative extension agent about the fungal pressure in your specific region and the resistant varieties best suited to your USDA hardiness zone. The roses that thrive with the least intervention are usually the ones that look most spectacular when it counts.